
In previous article, I mentioned If Contains Google Sheets Formula (With Examples) but in this article, I have mentioned step by step procedure to reset Microsoft Excel to its default settings.
Microsoft Excel is one of the best spreadsheet tools, and its settings have made it easy to use. Most times, you do not need to change these settings from the default to maximize its features, you may want to consider resetting the Settings if you have changed a few things at some point.
This article will teach you how to reset Microsoft Excel to its default settings if you do not like some changes you already made. Read on!
There are three methods for resetting Excel to its default settings. You can use the Windows Registry Editor, the PowerShell app, or reinstall the Microsoft office program. Let’s get into the details already!
Method One: Reset Excel Settings Using The Registry Editor
The Windows Registry Editor is a graphical tool for viewing, monitoring, and editing the operating system's registry. It can help you restore or reset several programs including Microsoft Excel.
Follow the steps below to reset Excel settings using the Registry Editor:
- Press Windows + R to open Windows Run utility.
- Type Regedit and press the Enter key to open the Registry Editor.

- Click "Yes'' on the popup that comes up to give access to the program.
- On the left window pane, navigate to HKEY_CURRENT_USER > Software > Microsoft > Office. You can copy and paste the path into the Registry Editor address bar.

- Click on the arrow next to the " Office" folder, to drop down the sub-items under it. You may see different versions of Office after the expansion, depending on your Microsoft Office version. Some of the likely versions are 14.0, 15.0,16.0, etc.

Each version you see in the folder links to each version of Microsoft Excel. Therefore you should know your M.S Excel version before proceeding.
- Now, select the 12.0 folder if you use Excel 2007, the 14.0 folder if you use Excel 2010, the 15.0 folder if you use Excel 2013, and the 16.0 if you use Excel 2016 and other latest versions.
- Right-click on the folder that corresponds to your Excel version, and click on "Delete."

- Close the Registry Editor after confirming the deletion.
The action will delete every customized setting you have applied to Microsoft Excel on your PC and automatically restore the default settings.
Method Two: Reset Excel Settings Using PowerShell
PowerShell is a command-line interface (CLI) based tool you can use to automate tasks and configurations using code. With PowerShell, you can restore Excel settings on your computer as follows:
- Press Windows + R to open Windows Run utility.
- Type PowerShell in the text field and press the Enter key to open the PowerShell app.

- Paste the command below in the command line.
Remove-Item -Path HKCU:\Software\Microsoft\Office\<ExcelVersion>\Excel -Recurse
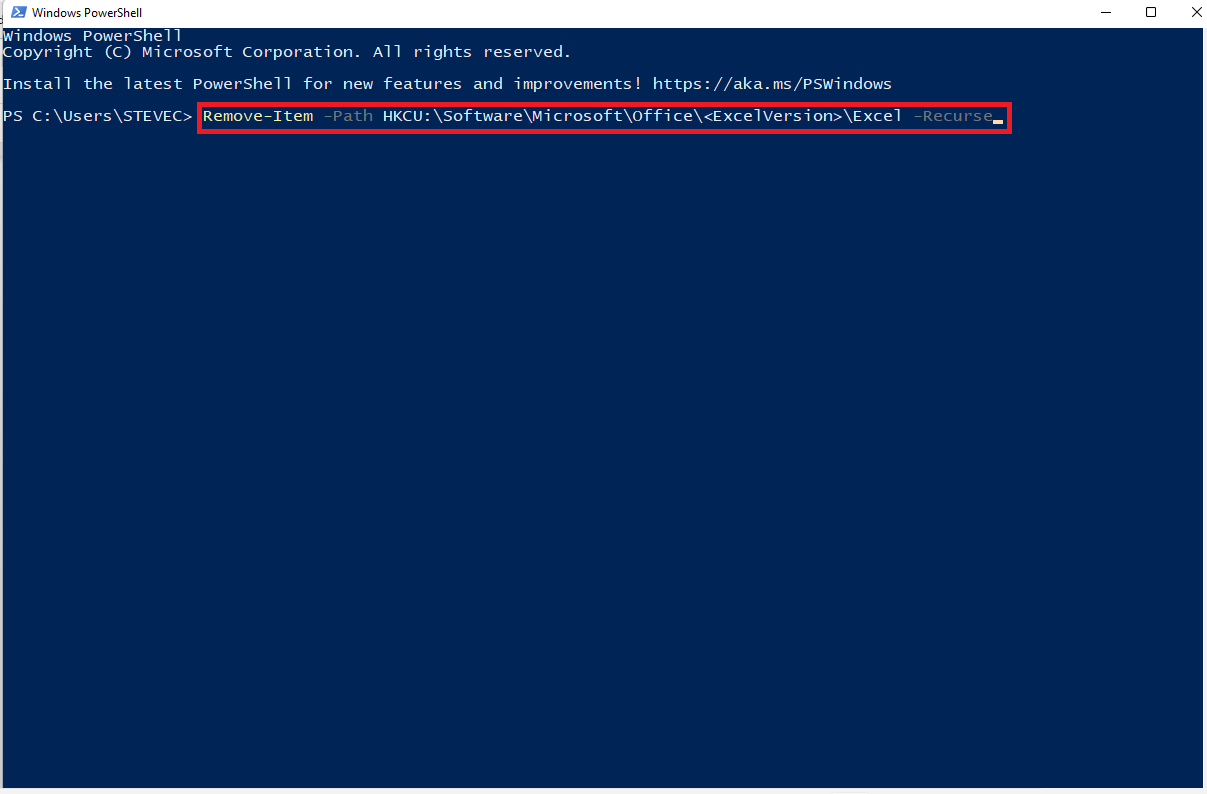
- <ExcelVersion> is a placeholder. therefore, you need to replace it with the Excel version you have on your PC. If you don’t know what version you have, check the next step.
- Enter 12.0 for Excel 2007, 14.0 for Excel 2010, 15.0 for Excel 2013, and 16.0 for Excel 2016 and later versions.

- Press the Enter key to run the Command.
- Close PowerShell after you have typed in the command.
This command removes all items in the Remove-Item -Path HKCU:\Software\Microsoft\Office\<ExcelVersion>\Excel -Recurse path, and resets Microsoft Excel settings to default.
Method Three: Uninstall And Reinstall Microsoft Office
Though the two methods above are sufficient, you may want to try the last method in this guide, which is the most effective, especially if the earlier methods fail.
This method will fix all Excel problems and will completely uninstall Microsoft Office from your PC before you reinstall it. Follow the steps below to use this method:
- Download the Microsoft Support and Recovery Assistant (SARA) utility here.
- Open the downloaded file, and run the SetupProd_OffScrub.exe application.
- Click Install to install the Microsoft Support and Recovery Assistant utility tool.
- After the installation is complete, click Agree. Then click Yes.
- Wait for the Microsoft Support and Recovery Assistant utility tool to troubleshoot problems.
- Select the checkbox next to the name of the Microsoft Office product installed on your computer and click Next.
- Wait until it has removed Microsoft Office from your computer.
- Restart your computer after the removal process.
After you restart your computer, visit the Microsoft Office website to download Microsoft Office. Note that this process does not remove your files, documents, or other data relating to the Microsoft Office programs.
Conclusion
Resetting Excel to its default settings is necessary, especially when you make changes you do not like. Try one of these methods, and you will find that resetting Excel is easy.
You may also like to read:
Top 6+ CPU-Z Alternatives For Windows Or Mac
Free And Open Source Google Sheets Alternatives
