
In previous article, I mentioned How To Fix Msvcr110.dll Missing Error On Windows 11 but in this article, I have mentioned how you can change drive Icons in Windows 10 or Windows 11.
Windows has a lot of default icons that are not up to taste, and some of those icons are drive icons. As expected, Windows does not provide the option of changing the default drive icon, but you can.
In this article, you will learn how to change the default driver icon in your File Explorer on Windows 10/11. Let's get to it!
How Can You Change Drive Icon In Windows 10/11?
There are two ways to change the default drive icons on Windows 10/11. You can either change drive icons using the Registry Editor or the autorun.inf file. But first, you need to download an icon different from the default icon.
How To Download New Drive Icons
Changing your drive icon implies selecting a custom icon other than the default. Therefore, you should first download new icons if you don't have alternatives yet. To do this:
- Go to Icon Archive, Iconspedia, or other websites like them where you can download Drive icons. Let's illustrate with Icon Archive here.
- On the Icon Archive homepage, enter the keyword "hard drive" in the search box and click on Search Icons.

- You will see different icons you can choose on the search results page; Click on your preferred icon to continue.

- Next, click the ICO button under the icon on the following page to download it.

- Open the folder which contains the downloaded icon.
- Right-click on the icon and select the Copy as a path option.

Change Drive Icon In Windows 10/11 Using Registry Editor
The Registry Editor is a tool that enables authorized Windows users to view and make changes to the Windows registry. With the Registry Editor, you can make changes you usually can't make in your Windows Settings app, one of which is the drive icon. Follow these steps to change the drive icon in your Windows 10/11 computer using the Registry Editor.
- Press Windows + R to open the Windows Run utility.
- Type Regedit in the text field and hit Enter to open the Registry Editor.

- In the Registry Editor, navigate to the path below:
HKEY_LOCAL_MACHINE\SOFTWARE\Microsoft\Windows\CurrentVersion\Explorer\DriveIcons.

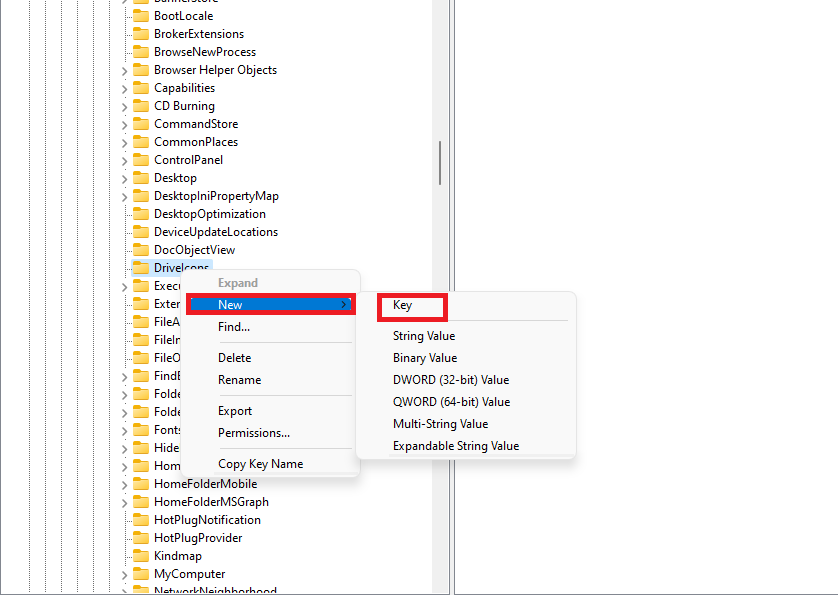
- Right-click on the DriveIcons folder in the left pane of the Registry Editor and select the New > Key.
- Rename the new key (folder) you created. Enter C or D as the new name for the C: or D: drive.

- Again, right-click the key you added and go to New > Key.

- Rename the new key as DefaultIcon.

- Select the DefaultIcon key, then double-click its string on the right pane of the page to edit the string.

- In the Edit String prompt, click on the Value data field and paste the downloaded drive icon path you copied earlier in the field.

- Click OK or press the Enter button to save the changes you made.
- Close the Registry Editor and reboot your computer.
If you change your mind and prefer to have the default icon back, you can do so with the Registry Editor by opening the DriveIcons key within the Registry Editor and deleting the C key you created.
How To Change Drive Icon In Windows 10/11 Using autorun.inf File
The autorun.inf file is a text file located in the root directory of a drive that provides the system with the name and location of an application's startup program. Follow these steps to change the drive icon in Windows 10/11 using the autorun.inf file.
- Download a new icon with the steps discussed earlier in this post and note the File's name.
- Open the file location and copy the File.
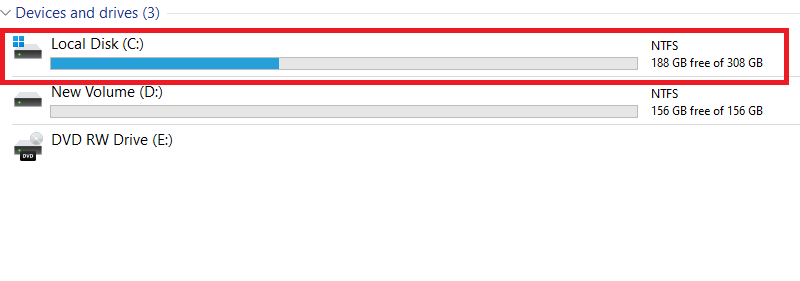
- Open the drive you want to change its icon, the C: drive in this case, by double-clicking the drive from the File Explorer.
- Paste the copied File into the root of the drive. Do not paste the File into any folder when you open the drive.

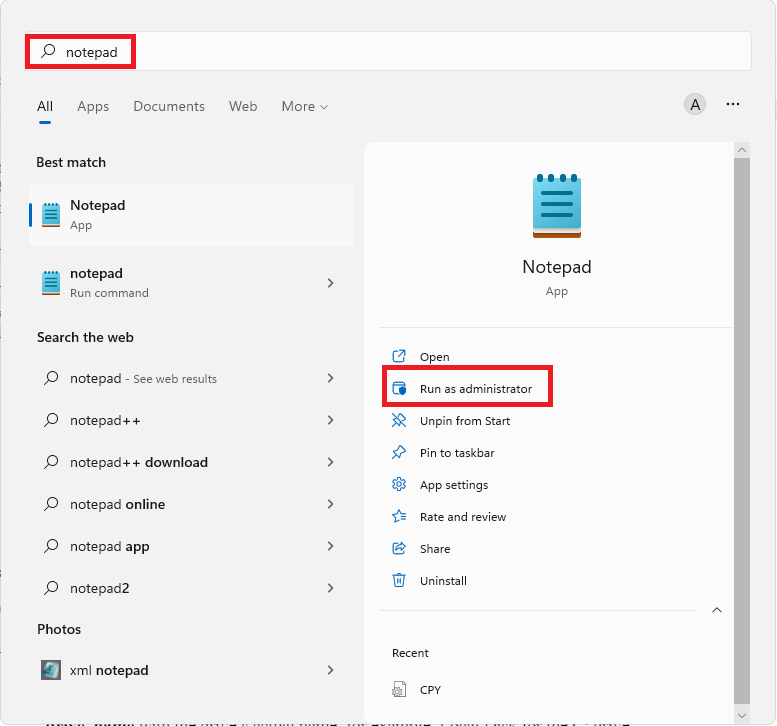
- Next, open the notepad app with the Windows search button. Click search on the taskbar, type notepad in the search bar, and click Run as administrator on the search result page.
- Copy and paste the text below into the notepad.
[autorun]
ICON=Phantom.ico
Label=drive_name

- Replace Phantom in the opened notepad with the icon's name, retaining the .ico extension, as seen in the image below. Also, replace drive_name with the drive's actual name, for example, Local Disk for the C: drive.

- Press Ctrl + S to save the notepad file.
- The system will take you to the Save As page. Enter autorun.inf as the File name, and select All files as the Save as type. Then, click the Save button.

- Restart your computer to apply the changes.
Conclusion
The default drive icons in Windows 10/11 may be boring, or you may want to explore other customization options with it. The two methods in this post will help you achieve your goal successfully.
You may also like to read:
Enable - Disable Mouse Acceleration in Windows 11
How to Enable or Disable OneDrive Notifications on Windows PC